Quick Answer
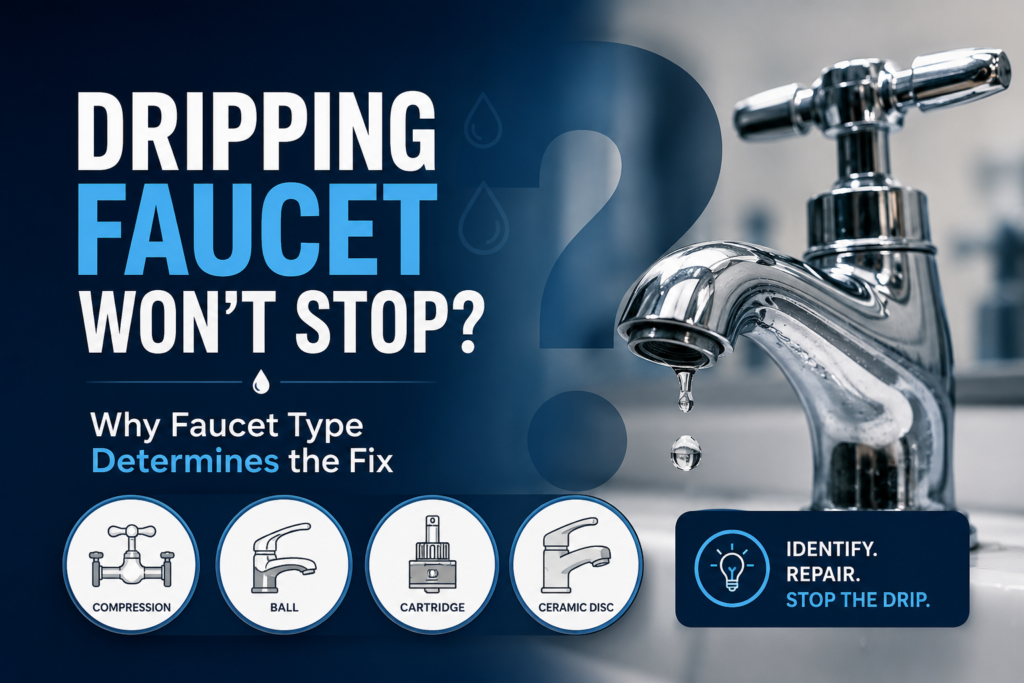
A dripping faucet is almost always a worn seal, washer, O-ring, or cartridge. The correct replacement part depends entirely on your faucet type. Using a compression washer fix on a cartridge faucet — or vice versa — wastes time and money. Identify the type first, then replace only the failing part.
The Faucet Type Decision Table
| Faucet type | How to identify | Part that fails | DIY difficulty |
|---|---|---|---|
| Compression (two handles, older homes) | Two separate handles; resistance felt as you turn them closed | Rubber seat washer at stem bottom | Easy |
| Ball (single handle, rotates in socket) | Single handle rotates freely in all directions; rounded cap under handle | Springs, seats, O-rings, or ball itself | Moderate |
| Cartridge (single or double handle, smooth) | Handle lifts or slides in a defined path with smooth resistance | Cartridge — self-contained removable unit | Easy |
| Ceramic disc (single lever, wide cylindrical base) | Single lever on a wide cylindrical body; extremely smooth feel | Ceramic disc cylinder or sediment on disc face | Moderate |
Safety First
- Turn off supply valves under the sink before any disassembly — one for hot, one for cold. Turn clockwise to close. Open the handle to confirm no flow.
- Cover the drain with a rag. Small screws, springs, and O-rings are easily lost.
- Do not force faucet components. A stripped screw or cracked seat turns a $15 repair into a plumber call.
- If there are no under-sink shutoffs, use the home’s main water shutoff.
Where the Drip Appears Tells You More
| Location | Likely cause |
|---|---|
| From the spout with handles fully off | Internal washer, seat, or cartridge failing |
| Around the handle base | O-ring on the stem worn |
| Under the sink at supply connections | Supply line loose or supply line itself failing |
| Faucet base where it meets the sink | Base O-ring or plumber’s putty failing |
| Behind a tub or shower faucet (from wall) | Valve cartridge inside wall — often needs a plumber |
What to Do First
- Close supply valves. Open the faucet handle to release remaining pressure.
- Pop the decorative handle cap, remove the screw underneath, lift the handle. Photograph the internals before removing anything.
- Identify your faucet mechanism from the table. Search brand plus model number for the exact part.
- Bring the old part to the hardware store — matching by sight is faster and more reliable than guessing.
- Apply silicone-based plumber’s grease to new O-rings and cartridges before installing. Dry installation wears them faster.
- Reassemble in reverse. Hand-tight plus one-quarter turn on packing nuts.
- Restore water slowly and check every joint for leaks before reinstalling the handle.
What Not to Do
- Do not overtighten handles to stop the drip — this compresses the seat washer harder and accelerates damage, often cracking the valve seat.
- Do not try to fix a tub or shower valve inside a wall without confirming cartridge access through the trim.
- Do not ignore a slow drip — one drip per second wastes roughly 3,000 gallons per year.
- Do not use Teflon tape to stop a faucet drip — it seals threaded connections, not washer or cartridge leaks.
Related Guides
- Toilet Runs Constantly: Another Water Waste Source
- Low Water Pressure in Whole House
- Outdoor Faucet Dripping or Won’t Shut Off
Safe DIY Checks
- Identify the faucet type from the table before buying any parts.
- Photograph internals before removing anything.
- Match the old part at the hardware store — do not guess dimensions.
- Grease new O-rings and cartridges with plumber’s grease before installing.
- Restore water slowly and inspect all connections before reinstalling handles.
When to Call a Licensed Plumber
- Valve seat is visibly corroded, cracked, or pitted — seat resurfacing or replacement requires specific tools.
- The drip comes from inside a wall at a tub or shower valve.
- Supply line shutoffs will not fully close or they leak themselves.
- A correctly installed new cartridge still drips — the faucet body may be damaged and the faucet needs replacement.
Prevention Tips
- Operate handles fully open or fully closed — partial positions wear internal seals faster.
- If home pressure exceeds 80 PSI, a pressure-reducing valve protects faucet seals from accelerated wear.
- Replace faucet cartridges preventively every 5 to 7 years in high-use fixtures (kitchen, main bathroom).
- In hard water areas, a whole-house filter or water softener reduces mineral scaling on internal components.
Recommended Next Step
Identify faucet type, turn off supply valves, remove the handle, and photograph the internals. Most cartridge replacements take 20 to 30 minutes and cost under $25. A compression washer swap is a 10-minute job. Match the old part at the store.
Frequently Asked Questions
How do I tell if my faucet is a cartridge or ball mechanism?
Ball faucets rotate freely in all directions with a loose feel. Cartridge faucets move in a defined up-down or side-to-side path with smooth resistance. Search brand and model plus “repair kit” to confirm the mechanism type.
Why does my faucet drip only at night?
Municipal water pressure rises at night when demand drops. A failing seal that holds during the day leaks at higher nighttime pressure. This is also a sign that home water pressure may be above the recommended 80 PSI maximum.
I replaced the cartridge and it still drips. What next?
Confirm the part number is exact, that the cartridge is correctly oriented (most have an alignment tab), and that the retaining nut is snug. If a correctly installed new cartridge still drips, the faucet body may be damaged — full faucet replacement is often the next step.
Is it better to repair or replace a dripping faucet?
Under 10 years old with an intact body: repair. Over 10 years, corroded body, or hard-to-find parts: replacement is often faster and not significantly more expensive than repair plus professional labor.